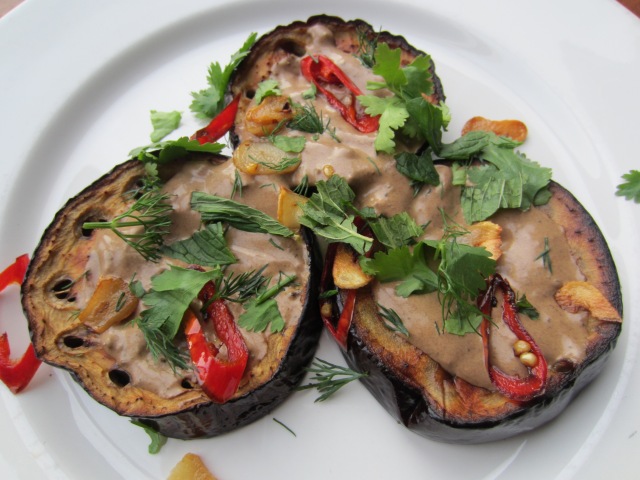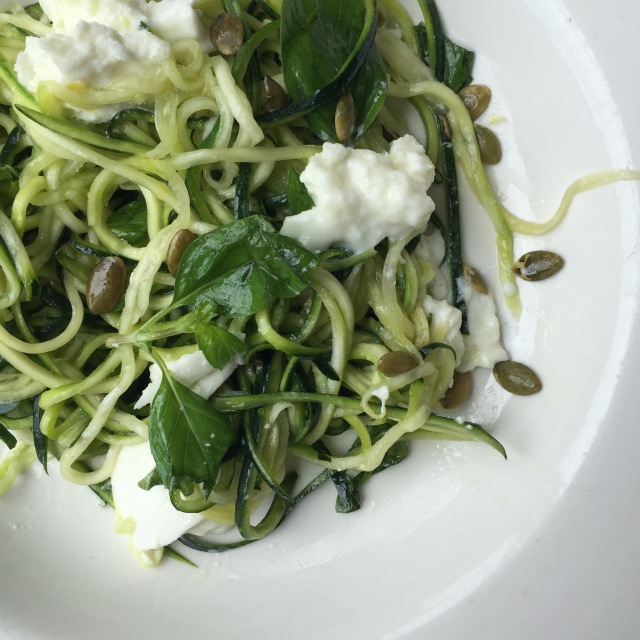
Zucchini and Basil Salad with Buffalo Mozzarella

  
Seems like zucchini aka courgette, is the hottest vegetable since cauliflower right now! Like cauliflower before it (which is used as rice or as a pizza base) zucchini’s status has increased to hot mostly because it is what the Paleo diet devotees use as a spaghetti substitute.

Long gone are the are the days of serving this veg as boiled or steamed slices of watery blandness. Just like the transformation zucchini has when it is char-grilled, raw zucchini is a revelation and is perfectly matched with a dressing containing basil, dill or mint. 

In this salad the flavours are married together with lemon and the creaminess of the buffalo mozzarella. I’m slightly obsessed with this salad having it at least once a week as a salad on its own for lunch or a side salad with a BBQ. You could substitute gooey burrata for the mozzarella, or add some chopped roasted hazelnuts or grate over some raw almonds instead of pepitas. Sometimes I add in some sliced cherry tomatoes to the mix.


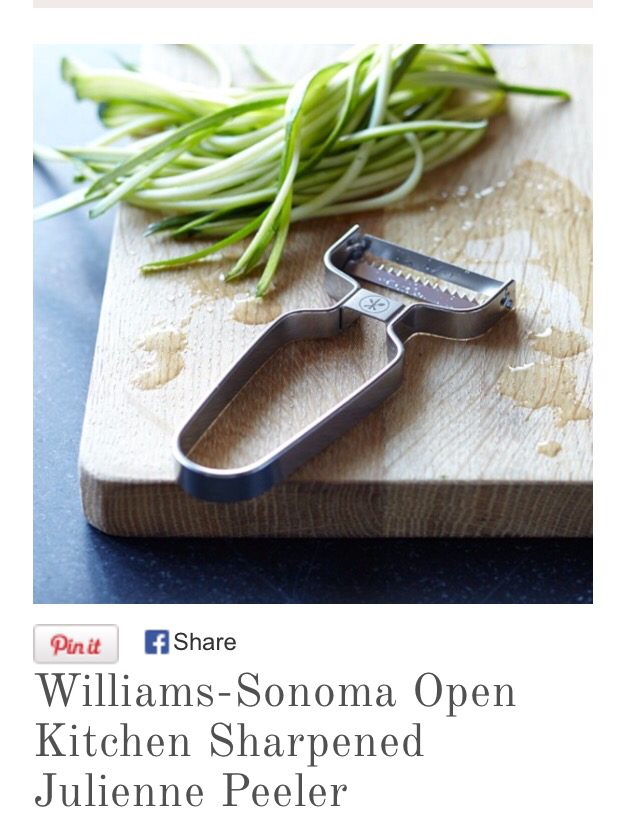
To make the zucchini strips you can use a spiraliser, or cut into thin slices and then julienne. The easiest way is o use a strip peeler. I got mine from Williams-Sonoma and it is great for carrot and green mango salads too.

  
INGREDIENTS

2 large zucchini (courgette)

1 generous tsp flaky sea salt

Zest of half small lemon

Squeeze of lemon juice

50ml olive oil

1/2 cup basil leaves, torn

1 buffalo mozzarella ball

1 tblspn pepita (pumpkin) seeds

METHOD

1. Slice the zucchini flesh into strips, stopping when you reach the seedy core. Place strips into a sieve (or colander) and sprinkle with the salt. Use your hands to mix the salt through and leave for around 3 minutes – in which time liquid will release from the zucchini and start to drain out.

2. Meantime place olive oil, grated lemon rind and lemon juice into a bowl and mix to emulsify.

3. Remove the zucchini from sieve. Squeeze the zucchini slightly with your hands to remove excess liquid and then place between absorbent kitchen paper. Press down lightly remove the rest of the moisture. You may need to replace paper and repeat.

4. Place the pickled zucchini in the bowl, stir into the lemon oil mix and leave for a couple of minutes to absorb the flavours. Then taste and add a little more lemon juice if required.

5. Add torn basil leaves and stir gently – I use my hands to do this. Break (not cut) the mozzarella into small pieces and place on two individual plates or a larger platter if serving shared. Shake off the excess dressing in the bowl as you place the zucchini over the mozzarella cheese pieces and mix again gently (with hands) to distribute it through. Sprinkle with pepita.

Serves 2 as a light meal or a side salad. Recipe can be easily doubled to serve 4.

Posted in Recipes, Salad, Vegetarian | Tagged , , , , , , | Leave a comment

Stamatis’ Octopus Stifado


Our good friend Stamatis is a great cook, and was kind enough to share his delicious recipe “Greek fisherman’s soup” last year on my blog. Recipe link here.  

This year on our trip to Greece he came to cook us octopus.

Stamatis had a restaurant for many years and was also commercially trained in the Army, working in the kitchen. When Stamatis says he is going to come and cook for us – everyone gets excited. Even the kids and Yia Yia. Everyone loves Stamatis’ cooking and his BBQ skills are much admired by all his friends (as well as his secret lemon mustard sauce for grilled chicken).


In Greece, kids grow up eating octopus and in fact, all the Greek kids that I know absolutely love it – even the fussy eaters. They love all seafood in general, even little fish like whitebait and sardines. Children in the Greek islands grow up learning to fish from a young age. 

This trip, my partner’s 7 year old niece caught an octopus in her tiny toy fishing net. She was so shocked she caught it (as were the people around her) that it escaped from the net in all the excitement.

Last year our friend Manolis caught an octopus with a piece of bread and a fishing line. Unheard of to catch like this … and his friends didn’t believe him, except we were witnesses and took photos … And it was a big one! After catching it Manolis then set about bashing it against the rocks and massaging it to break down and tenderise it in the traditional way. If they are going to grill it, the Greeks hang it on a line in the sun to dry it out for a couple of days.


It is probably fair to say that octopus (like oysters) is one of foods polarising ingredients – people that love it go crazy for it and people that don’t usually find the thought of it repulsive. There is very little in between. If you are in the latter camp don’t be put off by this recipe as Stifado is a Greek classic and is also made traditionally with rabbit, beef or chicken too, so you can easily substitute the octopus.

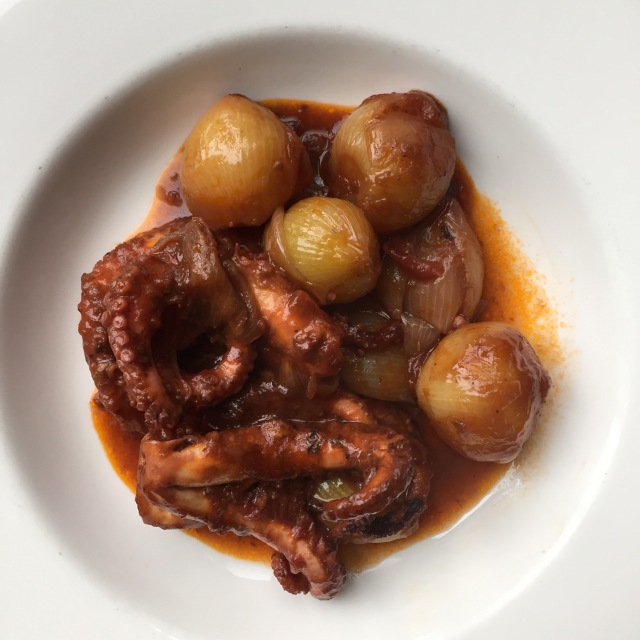
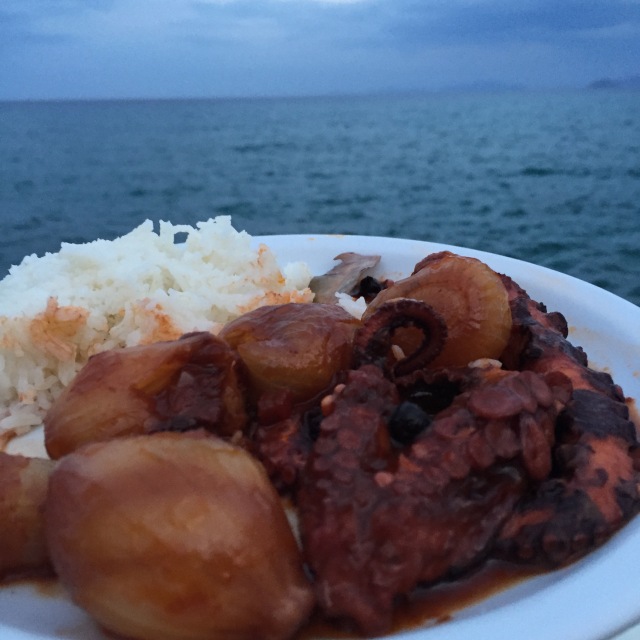
What makes the Stifado is the generous use of the whole baby onions that sweeten and caramelise the dish. You need at least equal quantities compared to the meat, or a little more. Paired with the sauce of red wine, tomato and aromatic spices traditionally Stifado is eaten with bread to mop up the sauce, but rice and potatoes are a popular accompaniment and this makes it a lovely gluten free meal. It also tastes the best if eaten by the sea 😎


This was my first foray into cooking octopus – and after seeing how it is done and how simple it is, I’m not sure what I was scared about. Soooo easy. Your fishmonger can clean it up and remove the beak and ink sacs.

Don’t worry if you can’t get your hands on a fresh octopus, freezing octopus makes it tender. So, for those of us living outside of a Greek island, the one you buy from your fishmonger will most likely have been frozen, so this is not an issue and it won’t affect your result. Just make sure it is completely thawed and drained before you cook it – do this by putting under running water for about 10 mins.

I have cooked this dish quite a few times since returning home (to much success) although our Australian octopus shrunk quite a lot, so I have taken to increasing the octopus quantity a little.

INGREDIENTS

1-1.2 kg octopus 

1-1.2 kg baby brown onions

3 bay leaves

4 cloves garlic

10 allspice balls

1/4 tsp black pepper

1/4 tsp salt 

2 small tomatoes, peeled and chopped into small dice

1/2 cup red wine

1 tblspn tomato paste and 1 cup water

1 stick cinnamon

5 whole cloves

2-3 tsp red wine vinegar
METHOD

1. If frozen thaw it out and drain it. Easiest way is under running water for about 10-15mims. 

2. Place in large pot and use cooking scissors separate the tendrils, and the head.

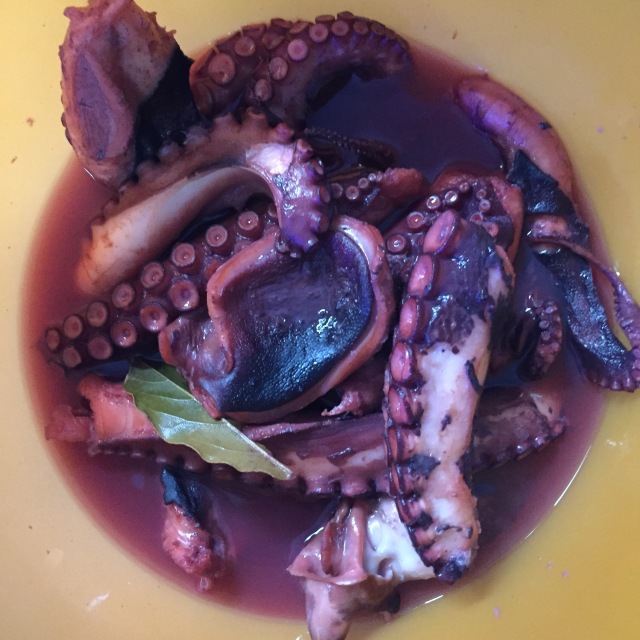
3. Boil the octopus with a splash of water and the bay leaves for around 30 minutes covered. Remove the saucepan lid and cook for another 10mins. It will be springy and rubbery but slightly soft. Remove from heat and place in a bowl with the cooking liquid and set aside.


2. Fry garlic cloves in 1/2 cup olive oil on low heat for 2 mins until fragrant. Add the onions and cook for a few minutes until starting to turn translucent. Stir often as you don’t want to brown them.

3. Add the allspice, salt and pepper and red wine. Cook out the alcohol for 2 mins. Add the lid and cook for another 10mins, rolling the onions often so as not to burn them. 

4. Add the fresh tomatoes, cinnamon stick. Stick the cloves into a couple of onions so that you can find them and remove at the end of the cooking. Cover and cook for 10mins.


5. Add vinegar, and the tomato paste that has been mixed through the cup of water. Simmer gently for 15mins.

6. Return the octopus to the saucepan along with about 1/4 cup of octopus cooking liquid – this imparts a richness to the sauce. Cover and cook gently for 45-60mins until octopus is meltingly soft. Leave to rest for 15mins.


Serve with rice, crusty bread or baked potatoes.

Serves 4 as a meal on its own or 8 as part of a banquet.

Posted in Uncategorized | Leave a comment

Hawaiian Ahi Poke

IMG_0023
  

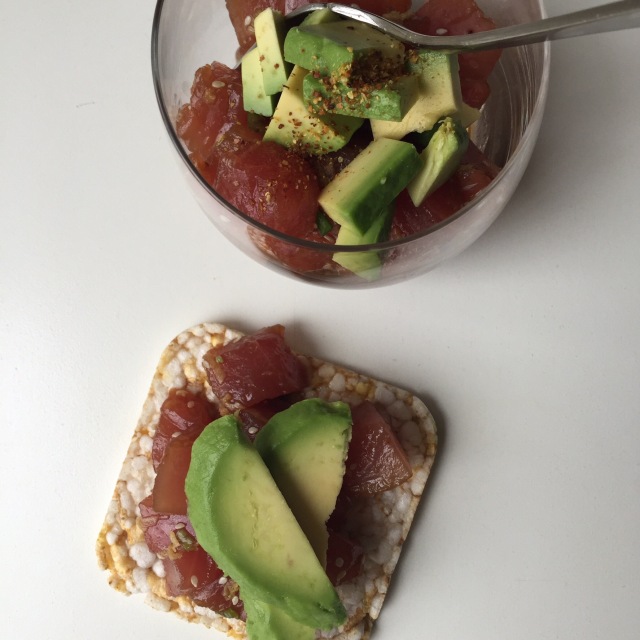
Akin to Japanese sashimi – Hawaiian Ahi Poke can be traced back to the Polynesian traditions of eating raw fish. Ahi is the Hawaiian word for tuna. This is simple and low fat meal to prepare and is a perfect light light lunch or entree.  In Hawaii “Poke” bars serve numerous versions including some spicy or non-spicy varieties. All versions include soy – some include ginger, and/or garlic, macadamia nuts or green shallots.    

  
I have road tested loads of versions and created one that I prefer. My taste buds feel that the inclusion of avocado is a mandatory – and as the avo grows very well in the tropical climate of the Hawaiian Islands it is an authentic accompaniment and its creaminess offers a good balance to the texture of the raw fish.

Omit the Sriracha if you don’t want spice and increase if you like it hot. Togarashi is a Japanese chilli pepper condiment easily found in an Asian grocers or most big supermarkets that have a well stocked Asian section.

IMG_0009  
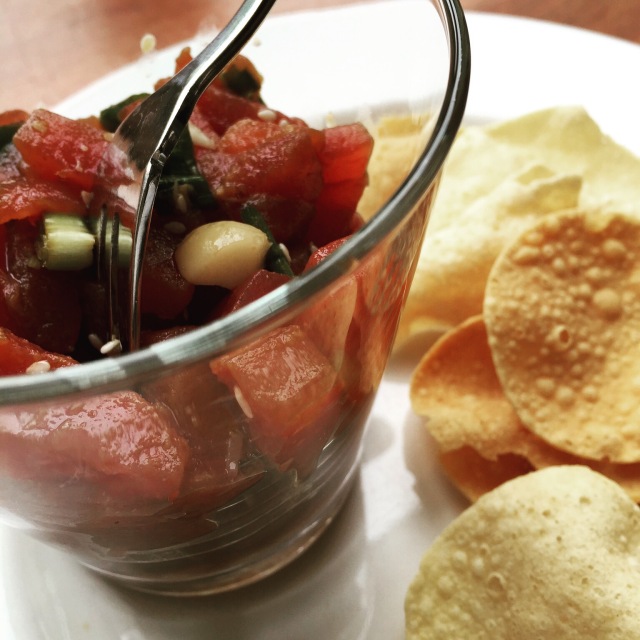
A poke bowl is when the tuna is served with steamed rice, but when I make this at home often I don’t have time to cook rice, so serve it with some kind of cracker.  Rice crackers with seaweed flavour, or rice cakes are good – both being gluten free. We also really enjoy this meal with a non traditional accompaniment – mini pappadams!!  

INGREDIENTS

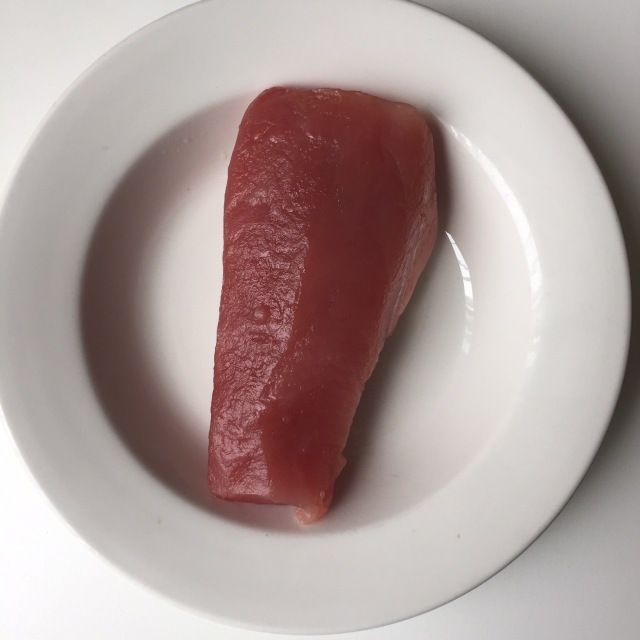
350-400g sashimi grade tuna (ahi)

1 tblspn gluten-free soy sauce

1 tblspn mirin

1 tblspn rice vinegar

1 tsp grated ginger

1 tsp sesame oil

1/2 tsp sea salt

1 tsp Sriracha sauce (optional)

1 green spring onion, chopped

To serve

1 tsp sea same seeds

Sprinkle of Japanese chilli 

1/2 avocado and a squeeze of lemon or lime

Crackers or boiled rice (see notes above)

Coriander leaves (optional)

METHOD

1. Cut the tuna into small 1,5cm dice and set aside whilst you make the marinade. 

 IMG_0008
2. Place all ingredients in a bowl and mix well. Add the diced tuna and stir through the marinade gently and leave for five to ten minutes to rest and absorb the flavours.  Test for seasoning and add a little more salt if required.

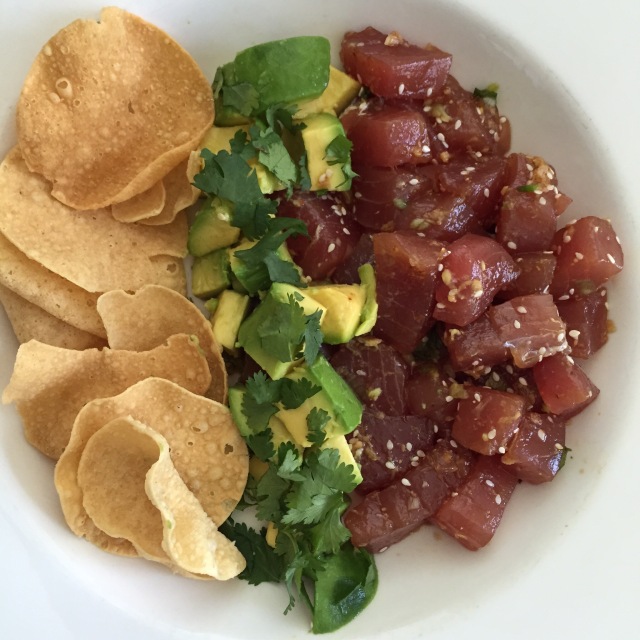
3. To serve. Cut the avocado into a dice the same size as the tuna and squeeze over some lime or lemon juice. A little coriander is also a nice addition if you have some lurking in your fridge.

IMG_0010  
4. Scatter the spring onions and sesame seeds over the tuna and sprinkle with the Japanese chilli pepper to taste and serve with avocado and steamed rice or crackers.

Services 4 as an entree or 2 as a light lunch.

Posted in Uncategorized | 2 Comments

Ottolenghi Aubergine (Eggplant) Salad

  
Yotam Ottolenghi is a food genius as far as I am concerned. His ability to create an alchemy of flavour with ingredients is something I find very inspiring.  His recipes do however sometimes require quite a number of ingredients – some of them unusual (which means you will often have to go searching for something you previously had never heard of). But it is this -for me- that makes cooking with his recipes so interesting. 

Take for example the rice dish that I’ve blogged about previously that uses Iranian dried lime. It took a while to search out where I could buy these, and afterwards I realised it was these strange little things they made the dish so unusual and delicious, and had me searching for other recipes to use them.

And so it is with this recipe – black garlic. What a strange ingredient, it taste almost liquorice like. Nothing like garlic at all. I had never heard of this ingredient before I discovered this recipe but it was actually really easy to find … I found that my local Woolworths was stocking it. But don’t worry if you can’t find it – pomegranate molasses is a good substitute (add 1-2 tsp).

I first tried this dish a while ago on a quick trip to London at one Ottolenghi’s cafes. I ordered a plate of salad that blew me away – not least because of the cost which was expensive (but hey that is London for you) but mostly, it blew me away because of the flavours.  I loved it all, and the beetroot ricotta was a close second, but my favourite salad on the plate was the aubergine (eggplant) and once I got home I set about trying to re-create it.

  
I researched and experimented and came up with something close but it wasn’t until Ottolenghi’s cookbook ‘Plenty More’ was published, that I found that he kindly published the recipe 👍. Although I followed recipe to the letter, it didn’t quite turn out the same as I remembered, so I have tweaked it slightly.  Use your favourite green leafy herb along with the dill – Yotam’s recipe uses basil and tarragon but coriander or mint also work well.

There is a lot to love about this eggplant dish, most of all is the method for baking the eggplant which circumvents having to fry in copious amounts of oil. Genius!

INGREDIENTS

3 medium aubergine (eggplants)

1/4 cup olive oil and 60mls for yogurt dressing

Sea salt and black pepper

200g tub Greek yogurt

1 tsp lemon juice

4 cloves of black garlic (or substitute with 1-2 tsp pomegranate molasses)

1 handful basil and coriander (see note above) roughly torn

1 tblspn dill roughly chopped 

1-2 red chillies – sliced diagonally

4 cloves of normal garlic – thinly sliced 

METHOD

1. Line a baking tray with baking paper and cut the eggplant into 1.5cm slices.

2. Mix 1/4 cup oil with 1 tsp sea salt and a few grinds of black pepper in a bowl. Give it a stir and then dip the eggplant into the oil mixture to lightly coat. Place each slice on baking tray and spend them out evenly.

3. Bake at 250c/480F until golden brown. This could take between 30-45mins. Remove from oven and leave to cool.


4. Meanwhile make the yogurt dressing. Chop roughly first, then squash the black garlic with the back of your knife so that the garlic is like a paste. In the small bowl of a food processor place the yogurt, 30mls olive oil, a pinch of sea salt and the black garlic paste. Give it a whizz until smooth and place in the fridge until ready to assemble.

5. Place a little oil in a saucepan and quickly fry the chilli and normal garlic slices until crispy but not burnt and place them on some kitchen paper to absorb any excess oil.

6. To assemble, drizzle the yogurt dressing over the eggplant. Sprinkle over the fried chilli and garlic, and scatter over the chopped herbs. Serve at room temperature.

Serves 4-6 as part of a mezze / tapas / side dish

Posted in Uncategorized | 2 Comments

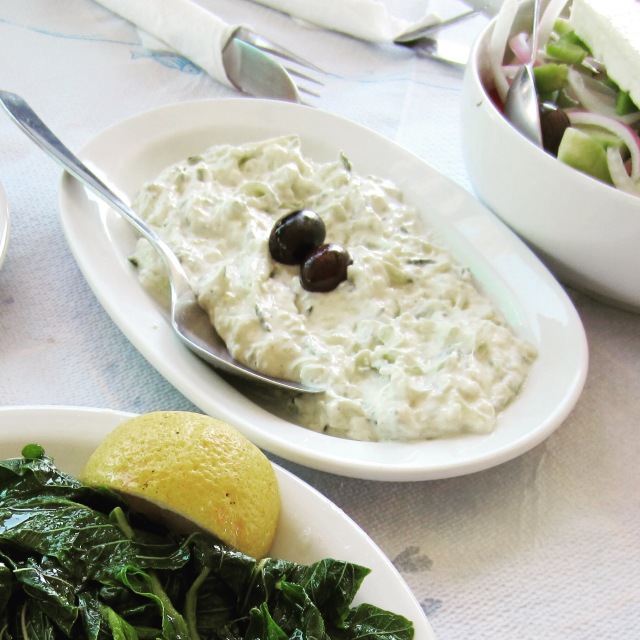
Real Greek Tzatziki


It is so easy to make proper Tzatziki and the taste is infinitely better than pre-made packaged ones you buy from a deli or supermarket.

This famous yogurt and cucumber dip is eaten as a accompaniment to most Greek meals. It will liven up a plate of vegetables, roasted or grilled meats and seafood. Or served simply as a dip with bread. 

I love it strong with garlic but it you prefer it more mellow reduce the garlic to one or two cloves. But it should pack a punch. The quality of yogurt will impact on the success. If you can’t get yogurt made in Greece, you will need to strain your yogurt for a few hours (through a muslin cloth) otherwise it could be runny. You don’t have to do this step and I’ve made it successfully without it, but it is recommended for an authentic result.

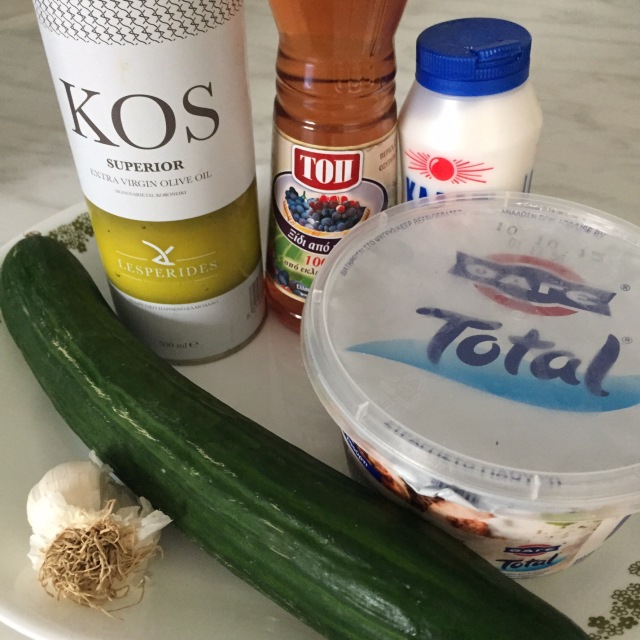
Here’s how. First gather your ingredients:

1 telegraph cucumber, 500g strained Greek yogurt, 3 (or 4) cloves garlic, olive oil, red wine vinegar and salt. 

  
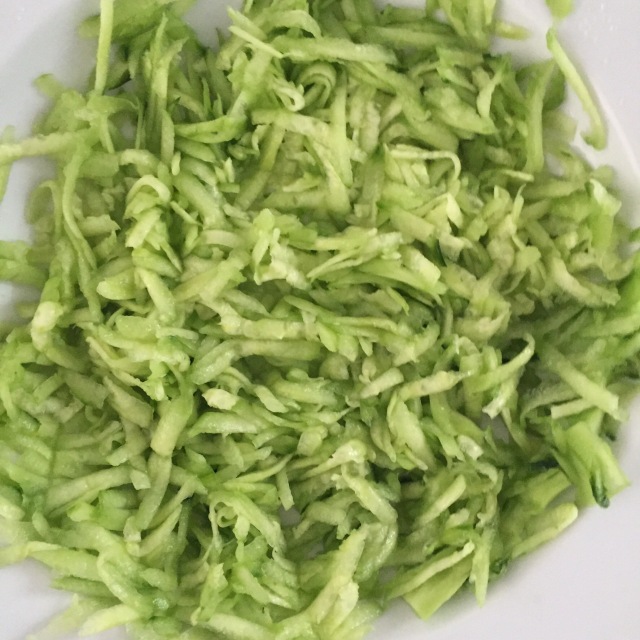
2. Grate the cucumber with a coarse grater (skin still on) and sprinkle liberally with some salt. Leave to marinate for 10 mins -ideally in a sieve so that juice can drain away.

  
3. Meanwhile peel and grate the garlic using a fine microplane grater (make sure you remove the green garlic shoot in the centre to avoid garlic repeating on you later). In a bowl, add 3 tsp red wine vinegar, a sprinkle of salt and 2 tbsp olive oil. Stir and leave it sit while the cucumber is doing its thing.

  
4. Take handfuls of the cucumber and squeeze out all the juice and place into the garlic/oil mix. Give it a good stir then add the yogurt. Mix it up and taste. You will need to add more salt (maybe up to 1 tsp) and perhaps a little more oil or vinegar to get it just right. Keep tasting. Tzatziki must be seasoned well so don’t be afraid of salt.

  
5. Lastly refrigerate for 30mins to allow the flavours to develop and test again before serving to check again for seasoning.

6. Eat and enjoy … knowing  you will be safe from vampires. Will keep a few days in the fridge if you don’t eat it all.

Makes 500g, which is enough to feed a group of 10.

Posted in Uncategorized | 5 Comments

Tomato Marmalade

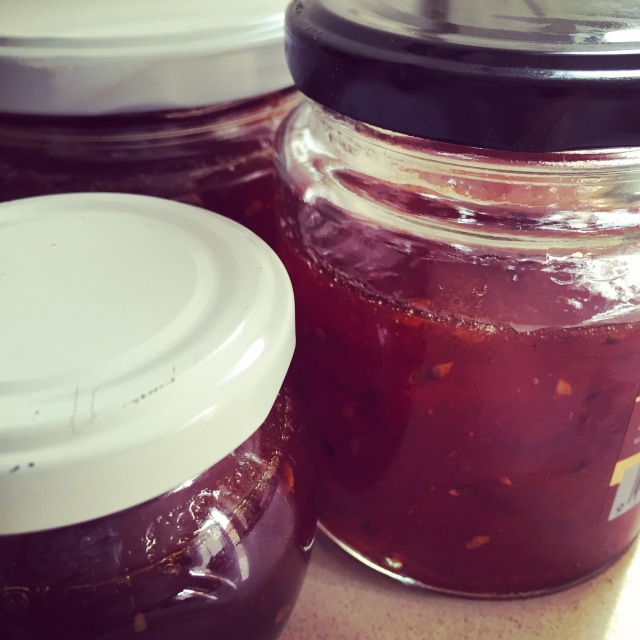
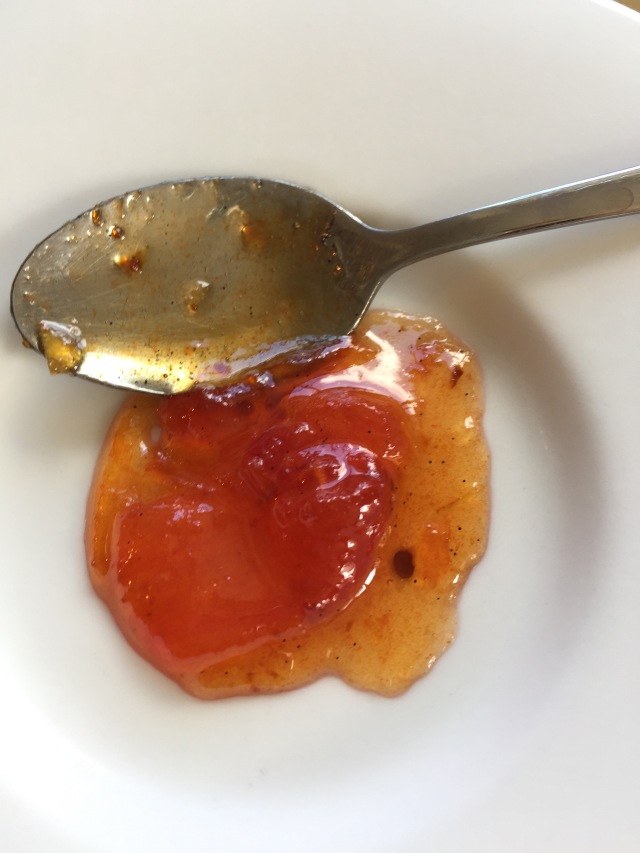
 Tomato spoon sweet are whole candied tomatoes in sugar syrup and are a very traditional treat on the Greek island of Kos.  Taking it a step further – tomato jam, or marmalade as it is known, is also a local favourite and as strange as it may sound, it is a fantastic accompaniment to Greek yogurt.  So much so, that is has replaced our usual Greek honey with walnuts as our favourite topping.

Last trip to Greece we savoured and rationed the jar we brought home until, alas it was gone. So I took to the internet to try and find recipes to make it. After experimenting, including one failure along the way, I think I’ve come up with a pretty good rendition.

The marmalade is also excellent on toast, rusks etc. Try it topped with a little ricotta or my new favourite cheese – fresh Manouri (which is creamy and like a slightly salted firm ricotta).

A couple of points to consider … Firstly I prefer to use Roma tomatoes and secondly this must be made  when tomatoes are at their peak and most flavoursome. 

Don’t be tempted to grate the lemon rind, it tastes better when you have little tangible pieces as they candy and add a great flavour. Use a veggie peeler to take off thin slices of rind and then finely chop.

INGREDIENTS

1 kg Roma tomatoes 

500g castor sugar

Rind of one lemon cut into tiny dice (see above)

1 vanilla bean chopped in half (or 1 tsp vanilla paste) 

METHOD

1. Remove the skin from all the tomatoes. Do this by making a cross incision (with a knife) to tips of the tomatoes and pour over boiling water, leaving submerged for 20-30 seconds. Remove tomatoes from water and peel, the skin should slide off easily.

2. Cut tomatoes in half and squeeze to remove the seeds from 3/4 of the tomatoes and discard seeds. Leave the other quarter intact. Chop roughly all the tomatoes into 1.5 cm pieces. I prefer a chunky marmelade. For a more smoother consistiency cut them smaller (to 1 cm).

3. Place the tomatoes and the juice into a glass or ceramic dish. Pour over the sugar, add vanilla bean or paste) and stir well. Leave to mascerate for about 3-4 hours, stirring occasionally.


4. Place the tomato mix in a saucepan and add the chopped lemon rind. Bring to boil and simmer gently for around an hour. 

5. Meanwhile sterilise your jars which ever method you prefer. I do mine in the dishwasher. Also put some small saucers in the freezer to use to test the jam for readiness later.

6. At 45mins – test the marmalade . Take a saucer from the freezer and place a teaspoon of mixture in the centre.  After a thirty seconds run your finger through to see if it has thickened. Check again every 5mins until you can see the consistency has jellied and thickened – but is not solid.  Remove from heat.


7. Leave to cool slightly for around 15mins, then carefully spoon into jars.  Leave to cool completely in the jars before placing the lids on and sealing well. Will keep in the fridge for a year but trust me it won’t last long!

N.B. Don’t worry if it still looks like a lot of liquid when you test it … it will firm up when it cools.  The first time I made this, big rookie error … I removed some of the liquid and ended up with jars of sticky toffee! Which while tasted delicious but it nearly bent all our spoons trying to remove the stuff from the jar!!!

Makes around 500-600mls 

Posted in Uncategorized | 5 Comments

Radicchio Salad with Apple

  
This is my current favourite salad and it is a fantastic accompaniment to barbecued meat and crispy roast potatoes. It is also as pretty as a picture!

Radicchio is a red leaf lettuce and is immensely popular with Italians, chargrilled and drizzled with balsamic vinegar.  Sometimes called Italian chicory, it can be hard to find in your local grocer or supermarket, and because of its bitterness, people may find it challenging on its own with just a simple dressing.

It is the bitterness, however, that makes this salad what it is – a perfect balance of flavours – sweet (from honey, currants), tangy (from aople, vinegars), salty (from salt),  bitter (from radicchio) and unami/savoury (from parmesan, nuts).

Dry roast the nuts before you start and have everything ready to go so that you can whip up the salad just before you need to serve it.  To dry roast, add the walnuts in a dry fry pan and roast for a couple of minutes, remove and then pop in the pine nuts until light brown – being careful not to burn.

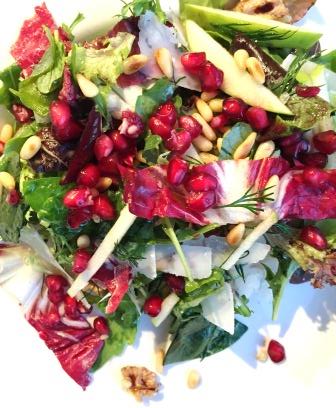
Oh – and if pomegranates are in season,  you won’t go wrong if you scatter over some of its juicy red seeds for added zing.

Raddichio salad with pomegranate

INGREDIENTS
½ head of radicchio, cut into 1-1.5 cm ribbons
1 large handful of baby rocket
1 large handful of mixed lettuce (mesclun)
¼ cup walnuts, dry roasted roughly chopped
¼ cup pinenuts, dry roasted
¼ currants
1 small green apple, cut into matchsticks
1 tblspn roughly chopped dill
Parmesan, shaved, to serve
Balsamic vinegar, to serve

Dressing
1/3 cup olive oil
1 tblpsn red wine vinegar
a generous pinch of sea salt and a drizzle of honey, about half tsp

METHOD

1.  Mix the lettuce, apples, currants and nuts with the dressing and stir through – taste for seasoning.
2. Drizzle over some balsamic vinegar (or balsamic glaze).
3. Using potato peeler, shave some parmesan generously over the top of the salad and serve immediately.

Serves 2-4.

Posted in Fruit & Vegetables, Italian, Recipes, Salad | Tagged , , , , , | 2 Comments

Authentic Sangria

Sangria 4

My visit to Barcelona last year reacquainted me with good Sangria and better still, whilst I was there I learnt how to make it. Sangria, for the uninitiated, is a wine punch, that has been traditionally drunk in Spain and Portugual for hundreds of years.

This recipe is proper, authentic Sangria and one that a Spaniard would be happy to drink.

Now, if you ordering a jug of Sangria at a Spanish restaurant outside of Spain, (or in a touristy restaurant in Spain for that matter) it can be a bit hit and miss. I’m always usually disappointed because it very rarely tastes that amazing – because they don’t use the magic ingredient … Licor 43.  Instead, they will serve up some wine and soda perhaps with a splash of brandy and a bit of chopped fruit thrown in.

Licor 43 is a Spanish liqueur which is made of fruit, herbs, spices and vanilla. It is quite nice on its own with lots of ice, a slice of lemon and a splash of soda or lemonade. It mixes well and can be used in cocktails.  In Australia, Licor 43 used to be very hard to find, but now it is widely stocked and I’ve seen it many Duty Free shops in airports around the world (including Sydney).

Sangria made properly is a delightful, refreshing and flavoursome fruit punch – best served with loads of ice.  The wine itself doesn’t need to be expensive but it should be one that you would happily drink on its own and be full bodied – ideally from Spain, if we are being authentic!

I learnt this recipe, sitting in one of the best Tapas bars in Barcelona, watching the barman making glass, after glass, after glass for the many locals imbibing their most popular national beverage.

The beauty of this recipe is that this is a quantity for one glass, so you can whip up any time you might feel a refreshing cocktail coming on! Obviously you can easily multiply the quantity to make a jug.

The bar had premixed the fruit into the wine. Feel free to marinate the fruit in the wine for an hour or two if you are making a jug, but sometimes there is no time to macerate the fruit so you can easily omit this step. Thanks to Licor 43, it will still be fabulous.

INGREDIENTS

15ml Licor 43
15ml Cointreau
100ml red wine
100ml lemon flavoured soda like Fanta or Lift (not Sprite or 7Up)
1 slice of orange, chopped into 8 pieces
1 tblspn chopped apple, skin on

METHOD

1. Half fill a large wine glass with ice.
2. Pour of the alcohol and top with lemon soda and fruit. Stir.

Serves 1

Posted in Recipes, Travel | Tagged , , , , , | Leave a comment

Roasted Cauliflower Salad

2014-12-18 20.15.42

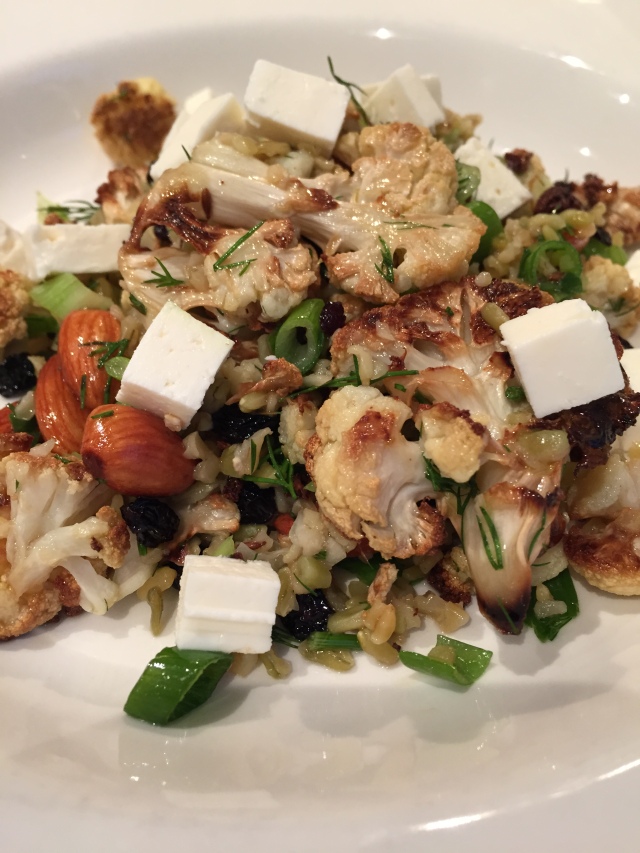
This dish is on high rotation in our house as it ticks a number of boxes. I’ve been trying to cook two meat-free dinners per week and even though this is vegetarian, it is still substantial – which means we aren’t starving within an hour of eating it. It is also high in fiber and is a cinch to cook when I get home from work.  It is great as a side dish with fish or a BBQ.

Originally adapted from a Karen Martini recipe, it is a very forgiving recipe and therefore exact quantities aren’t really necessary – it will still work and taste great. You can substitute a number of ingredients depending what you have in your pantry/fridge, so I’ve written it that way.  That said, it is a cauliflower salad … so the only mandatory ingredient is therefore, the cauliflower!

INGREDIENTS
1 whole head of cauliflower
1 tsp cumin seeds
sea salt
drizzle of olive oil

1 handful nuts …
– eg almonds, pistachio, walnuts, pepitas or sunflower

½ cup grain …
    – eg quinoa (GF),  buckwheat (GF), freekah (low gluten), barley or farro

½ cup finely chopped green shallots …
or scallion, red onion

½ cup chopped herbs …
eg parsley, basil, mint, coriander, dill or a combination

½ cup dried fruit …
– eg currants, cranberries, cherries or fresh pomegranate seeds

½ cup diced feta …
     – or crumbled goat cheese

Dressing
juice ½ lemon
drizzle extra virgin olive oil
drizzle pomegranate molasses (optional)
a scattering of pepitas

METHOD

1.  Cut the cauliflower in slices about 1cm thick and then remove most of the thick stalk from the slices. Drizzle over some olive oil, season with salt and sprinkle over the cumin seeds.  Spread the cauliflower out on a baking tray lined with baking paper.  I prefer to spead over two trays as it cooks quicker and browns better.  Cook at 180C for around 30-40 mins until the cauliflower is nicely browned.

2. Meanwhile, cook the grain you are using as per the packet instructions.

3. Once the cauli is done, remove it from the oven, throw the nuts on the tray and cook until slightly roasted – watch them carefully, takes about 3-5 mins.  Allow both the nuts and cauliflower to cool slightly for a few minutes.

???????????????????????????????

4. In a bowl, add the rest of the ingredients.  Throw in the nuts and cauliflower, including all the little caramelised bits.   Squeeze over the lemon juice, drizzle the pomegranate molasses, some olive oil and mix through. Season with sea salt to taste.

5.  Serve in a bowl or platter and scatter the feta (or goat cheese) and pepita over the top.

Serves 2-3 as a meal,  or 4 as a side dish.

Posted in Uncategorized | Leave a comment

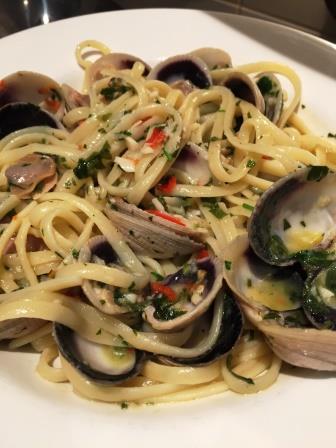
Spaghetti Vongole

Spaghetti VongoleThis is an Italian classic and like many classic recipes, it relies on a simple combination that allows each of the ingredients to shine. Here, the vongole is combined with the holy trinity of olive oil, parsley and garlic.

Vongole is the Italian word for clam but there are various species of similar shelled molluscs that include cockles, periwinkles and pipis.

Clams feature in dishes throughout the world, famously in America where they come in a the form of clam chowder or clam bakes (yes, there really is such a thing, it is not just the title of an Elvis movie) and by the Chinese who served them with XO sauce. In Spain, they are mad for tinned razor clams, which are an elongated variety and you will find fresh clams (Almejas) peeking out of Paella, or served any number of ways including stewed with chorizo and tomato.

Locally, Pipis have been eaten throughout the millenia by the indigenous Australians as evidenced by the remains found in shell middens (which are places where shell debris was collected over time).  Bennalong Point, the site of the Sydney Opera House, was in fact originally used as a shell midden.

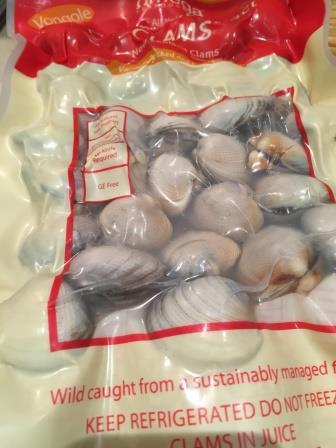
One of the fun things to do at the beach is to find your own clams, by digging and twisting your feet into the sand at the shoreline when the water rushes back out to sea – or do what I did … and buy them already cleaned of sandy grit and vacuumed packed from the supermarket!!!

Vongole packet

Make sure you use dried pasta, not fresh as fresh is too delicate for this recipe. It goes without saying if you are following a gluten-free diet to use gluten-free pasta, I used San Remo.  Like with mussels, discard any vongole that doesn’t open.

A teeny bit of grated Parmesan adds to the umami. Don’t diss it until you try it.

Please note: that this recipe is NOT paleo, low carb or low fat!

INGREDIENTS

250g dried (not fresh) spaghetti or linguine
2 cloves garlic, finely chopped
½-1 long red chilli, finely chopped (remove seeds if you can’t handle the heat) or pinch chilli flakes
¼ cup finely chopped parsley
500g Vongole, vacuumed packed
2 tblspn extra virgin olive oil
1/3 cup dry white wine, like Pinot Grigio
1/3 cup vongole juice, reserved from the vacuum pack
1/3 cup reserved pasta cooking water
sea salt
a knob of butter (20g) or another slosh of olive oil

1 tblspn grated Parmesan
chopped parsley to serve

METHOD

1. Firstly, put the water on for the pasta in a large pot. Meanwhile, as the water is heating, prep all the ingredients – including opening the seal of the vongole pack and draining out the juice.  Keep the vongole inside the pack until ready to put then in the pan.

2. Once the water is boiling, season the water well with table salt and once it returns to the boil, place the pasta in.

3. Once the pasta is in, heat olive oil into a large wide frypan with high sides or a casserole style saucepan.  Add the garlic, chilli and parsley and stir until aromatic – about 30 secs and then add the wine.  Let it all bubble away for one minute to burn off the alcohol in the wine, then add the reserved vongole juice and cook for another minute.

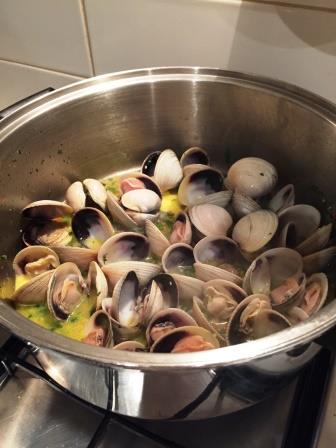
vongole cooking

4. Tip the vongole into the pan. Swirl the pan gently so as distribute the garlic sauce over and around the vongole. As they open, lightly sprinkle over some sea salt flakes and break up the knob of butter and scatter throughout the pan. Cover with lid and cook for a few minutes. Alternatively, you could use olive oil instead of butter, but I prefer the addition of butter.

5. Once pasta is just cooked to al-dente, strain, reserving 1/3 cup of the pasta water to add to the vongole. Tip the drained pasta over the vongole, add reserved pasta water, grated Parmesan and shake the pan (or stir) so that everything meshes together and the sauce emulsifies. Cook for another minute with lid on. Check for seasoning and add more salt if needed.

6. Serve immediately and sprinkle with a little extra parsley and grind of pepper.

Serves 2.  

Please note, I’ve been very generous with the sauce, so if you would like to make this to serve 4, you can increase the pasta to 350g-500g and use 1kg vongole but keep the rest of the ingredients the same. You may need to add a little extra pasta cooking liquid or olive oil if it seems too dry.


Posted in Italian, Recipes, Seafood | Tagged , , , , , | Leave a comment